Florida Polytechnic University has built a custom web application to support the Flex Learning Model that we are adopting due to COVID-19. With physical distancing protocols, Flex classes will have some students in-person and some students remote. Not all Flex classrooms have the capacity to seat all students in-person, and faculty need a way to ensure that their classrooms don't overfill. The idea behind the web application is that students would use it to indicate if they plan to attend in-person or remote, and if the classroom becomes filled, students would be put on a waiting list.
Release 2 coming soonis now available! Click Student Dashboard for Student Seat Reservations - Release 2 to learn more.
Contents:
| Table of Contents |
|---|
There are a few ways to access the Seat Reservation System:
1. Simply navigate to : https://netid.floridapoly.org/Accounts/seatreservation/index
More information about the Seat Reservation System can also be found on the Florida Poly website.
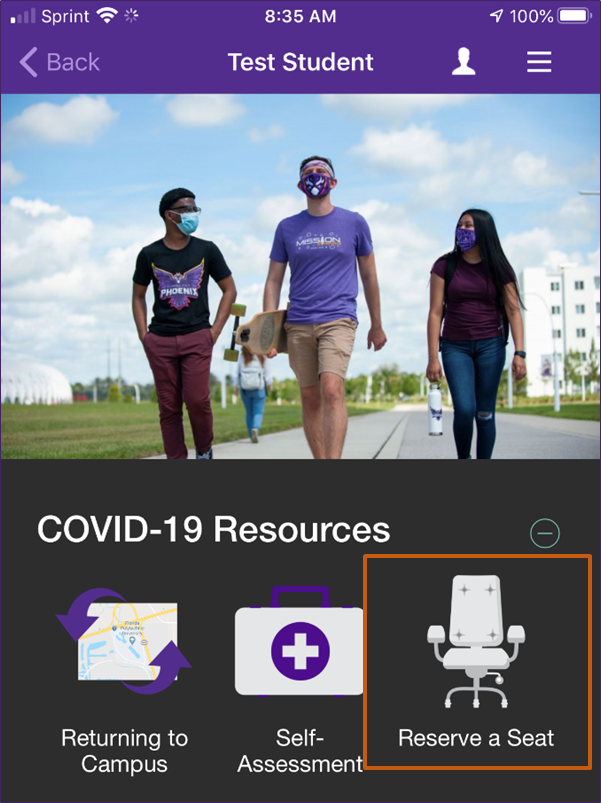
2. Select Reserve a Seat from the Florida Poly Mobile App
An Introduction to the Student Dashboard
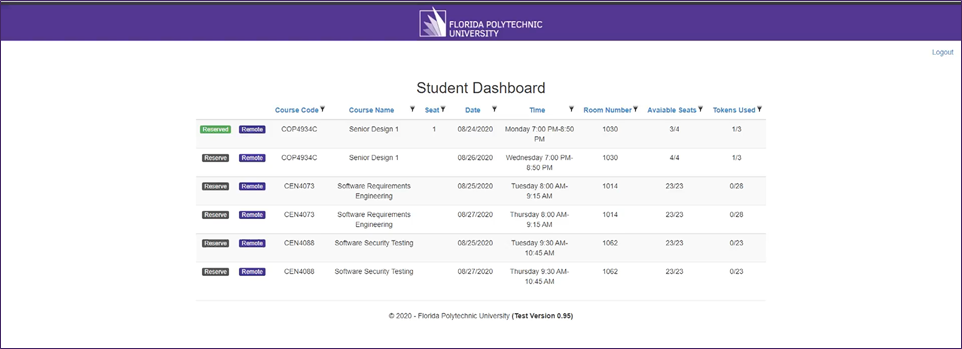
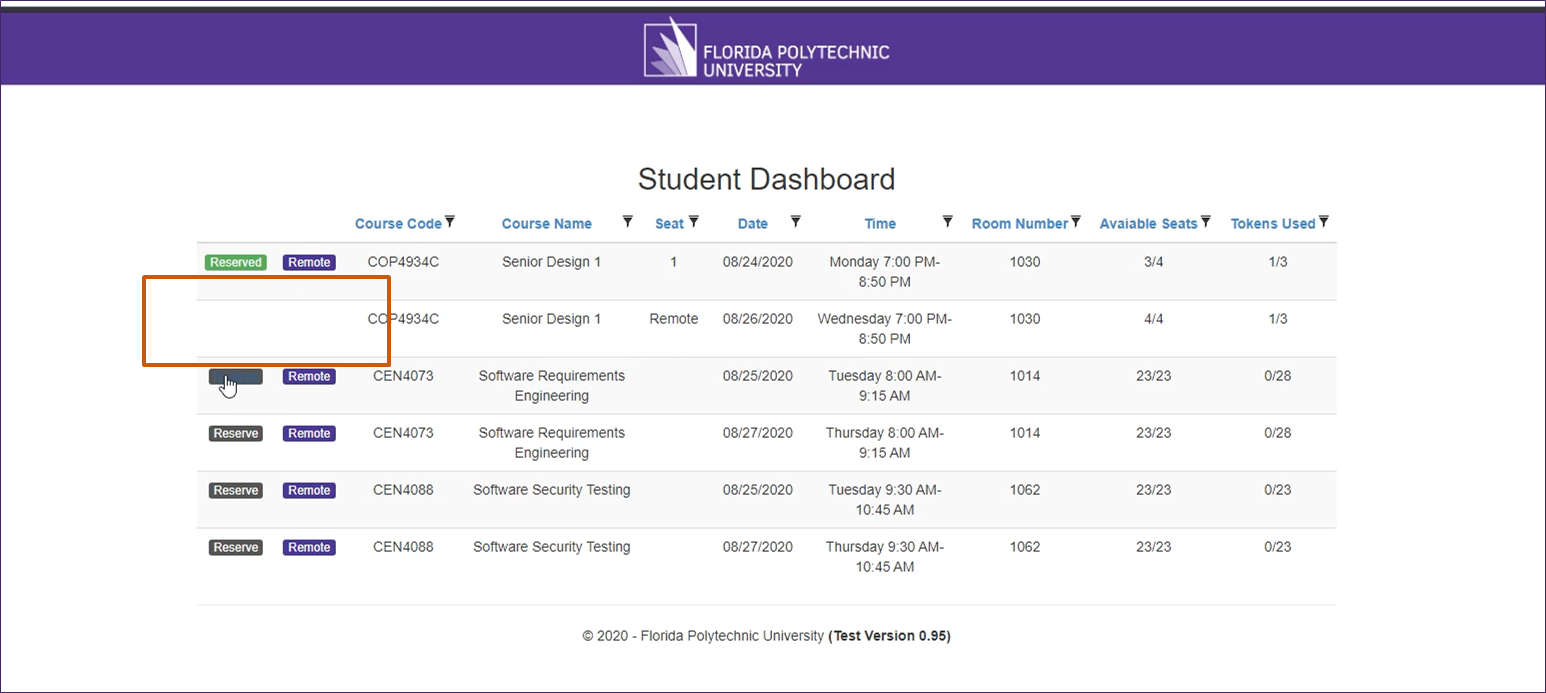
Reserving a seat in your class is both easy and intuitive. All of your Flex classes are displayed, complete with course code, course name, seat number, date and time, room number, the number of available seats, and tokens used. Note that this system is only applicable to your Flex classes. All other classes will not appear in this system.
There is also the option to sort and filter from any of the column headings.
Understanding Tokens
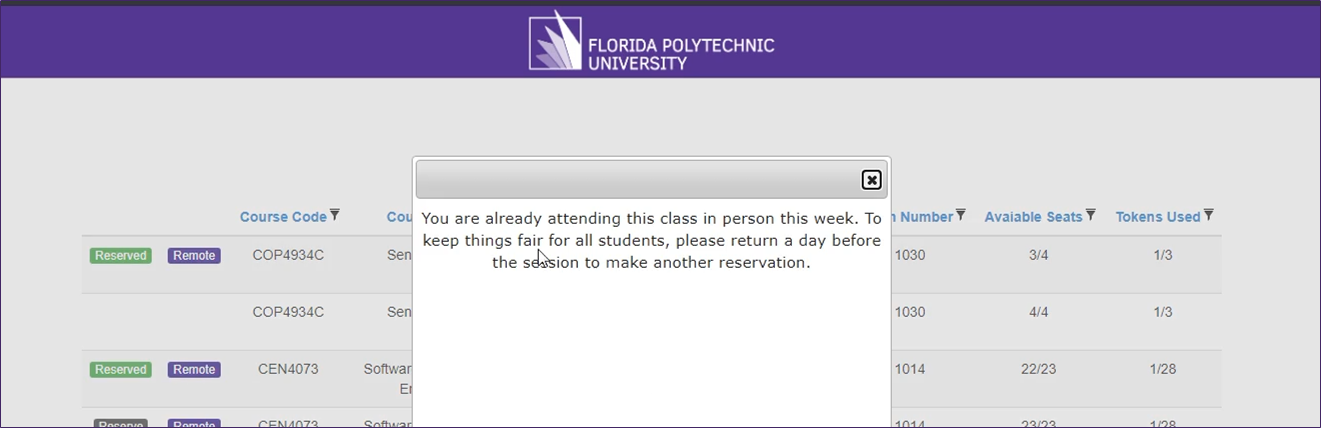
You will get a set of tokens at the beginning of the semester for each class. On Friday starting at 5:30 PM prior to each week, you can go ahead and use one token for a session of a given class as long as there is seating space remaining for that session. If you want to reserve more sessions for that class in the same week, you can register for that session the day before that class as long as there are seats available. Note that by doing so you will use one token toward that extra session. If you are worried about running out of tokens and not being able to attend in person, don’t. You can always book a class the day of as long as there is a seat available, no token needed.”
In case you’re curious, the number of tokens you’ll receive for the semester depends of on a few different factors and is calculated per below. This is to help provide a more fair system for reserving a seat in the case any particular classes regularly reaches capacity.

How To Reserve a Seat
Let’s now take a closer look at your student dashboard. The buttons on the left are primarily what you will use to choose a seat in a classroom or to list yourself as attending remotely.
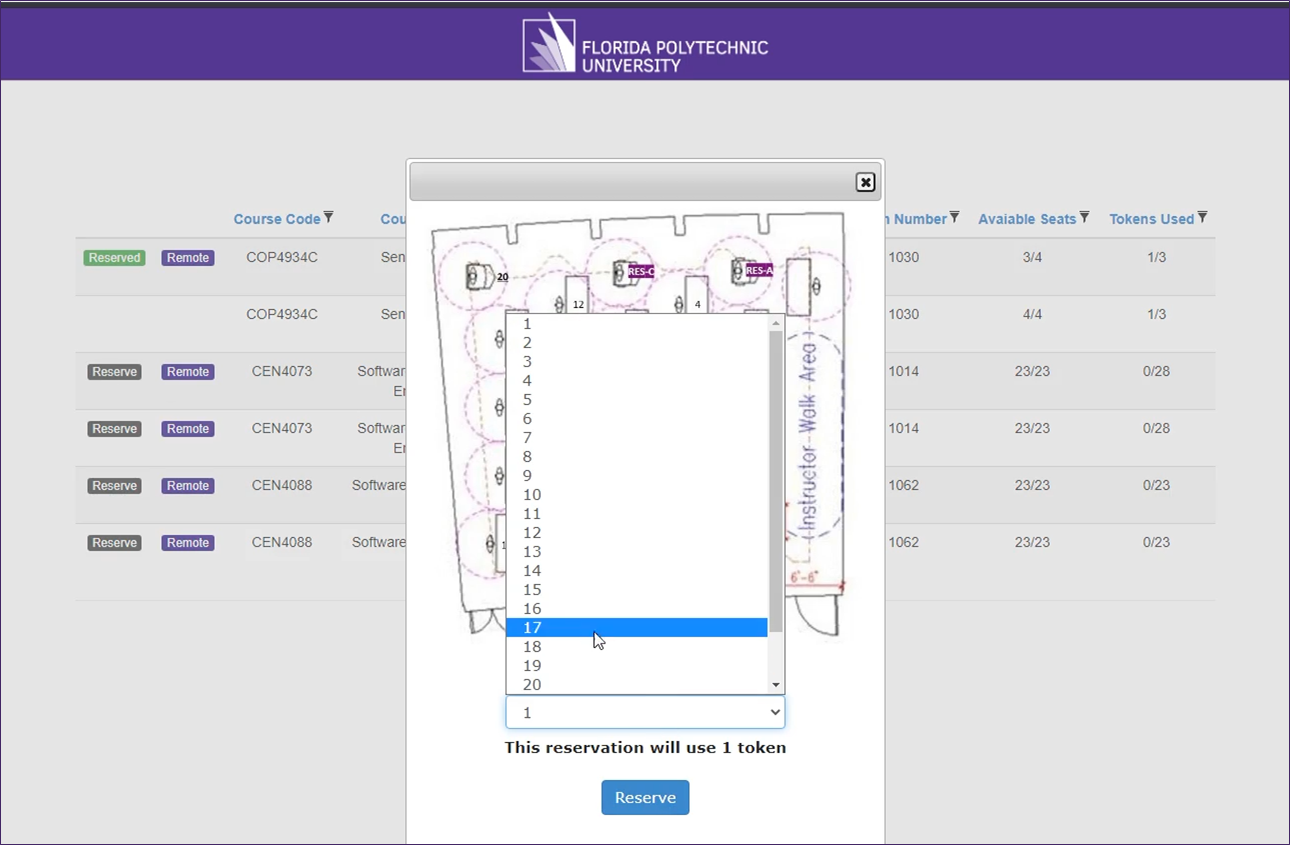
Selecting Reserve will open up a new dialog box with a diagram of the classroom layout and a drop-down of available seats.
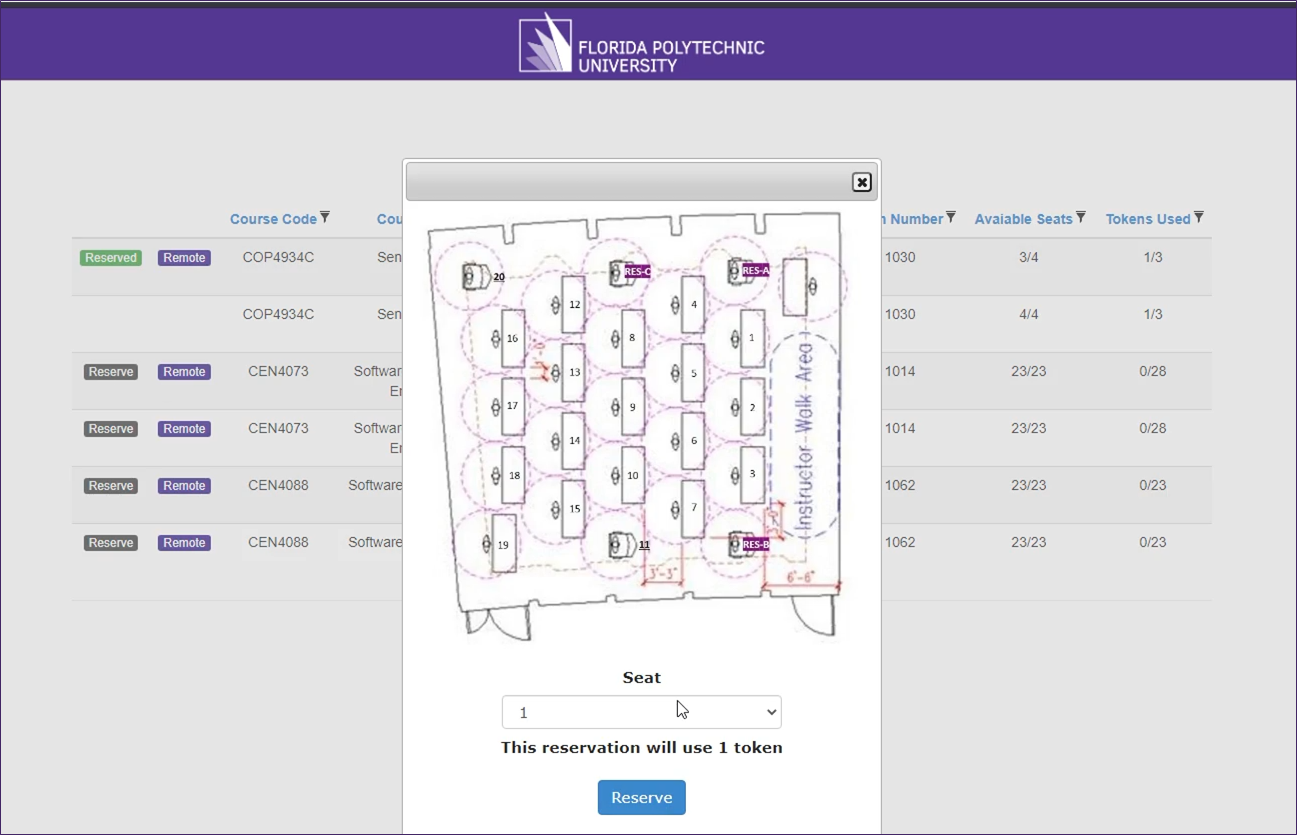
Use the drop-down menu to select your preferred seat. Click Reserve.
As long as there are seats still available, you can also switch seats in the classroom by clicking on the green Reserved button, choosing another seat from the drop-down, and pushing the Reserve button. You will notice that your seat has changed.
Going Remote
You can choose to attend class remotely as many times as you would like throughout the semester. What is important to remember, however, is that when you choose Remote, you cannot undo this.

Notice here that your options to change your attendance preference has been removed.
The Waitlist
If the physical seats in the classroom are full, you will have the option to be placed on a waitlist. This will appear as a gray Waitlist button in place of the Reserve button.
If a seat becomes available for you, then your seat will automatically change to Reserved in the web application, and an email will be sent to you confirming your seat in the class. If you decide to drop off of the waitlist for any reason and decide to be put back onto the list, you will be placed at the bottom of the list, having lost your place on the list.
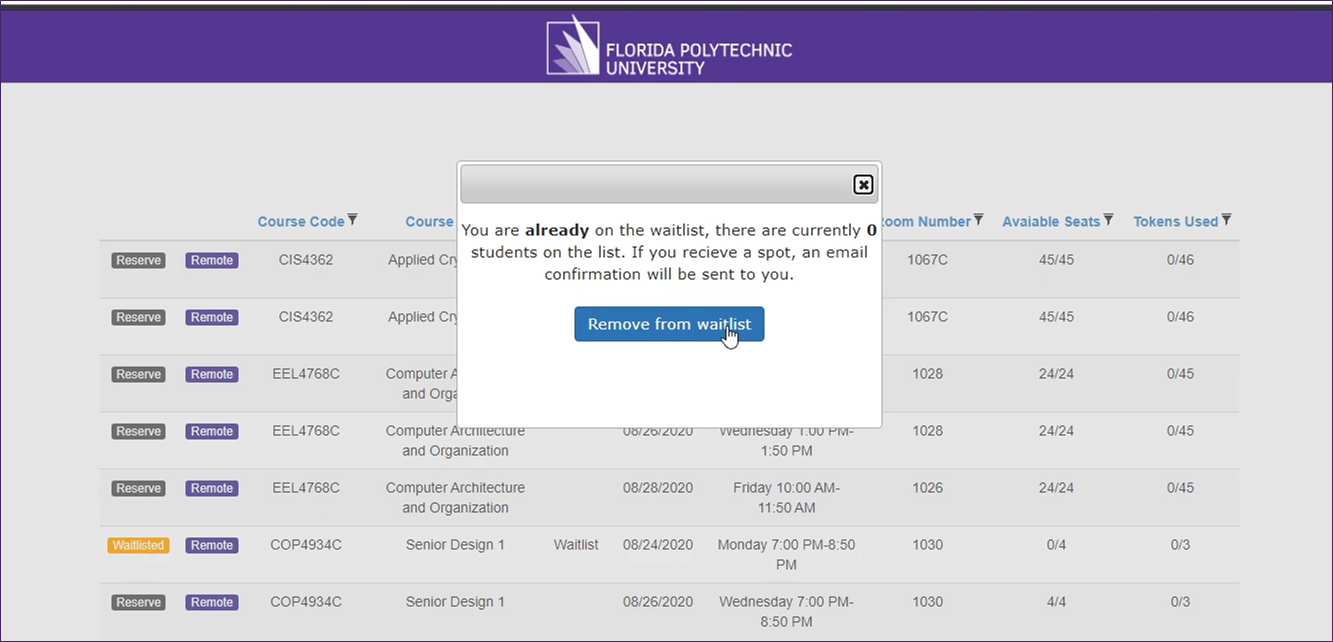
After joining the waitlist, if you’d like to see how many students are before you in on the waitlist, click Waitlisted, and the below dialog box will appear. This is also where you would see the Remove from the waitlist option.